
Case Studies
Implant Placement On The Narrow Maxillary Ridge
Dr Firdaus Hanapiah
BDS(Otago) MSc(Lon.) FDSRCS(Eng.)
Introduction
In many cases where patients require implants to rehabilitate the occlusion, clinicians find that there is not enough bone. Traditionally the clinician determines the bone quantity using the radiographs and clinical probing of the mucosa. However, with the advent of CT scans, three dimensional computer software solutions, and stereolithographic drill guides, the process of determining where ideally to place implants in bone has been greatly enhanced.
Case Report
A 46-year-old woman requested to have implants placed to support her partly edentulous ridge. Upon examination we found that there was a very thin maxillary ridge, at some points not more than 3 mm in thickness of bone. Therefore a technique had to be applied to place implants in the areas where there was enough bone and to angle them precisely to avoid bone dehiscence. SimPlant was used to simulate the implant placement.
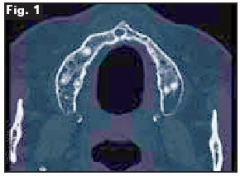
Fig. 1 shows an axial CT scan of the patient's maxillary ridge. Note the extreme resorption of the left ridge. With SimPlant the most appropriate diameter and length of the implants were determined. It was only possible to place two regular platform Branemark implants (NobelBiocare) with diameter 3.3 mm. The anterior right also showed resorption, it was only possible to place one regular platform implant. The exact positioning of these implants and their angulation was made possible with the aid of SimPlant.
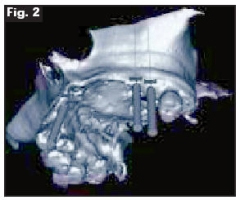
The surgery was carried out with careful placement of a bone-supported surgical guide made using stereolithography, and all three implants were successfully placed. The anterior implant was placed palatal to the crest of the ridge to avoid it from protruding too labially. The posterior implants were placed precisely parallel in a very shallow ridge of less than 11mm in height, the use of the SurgiGuide eliminated the risk of sinus perforation.
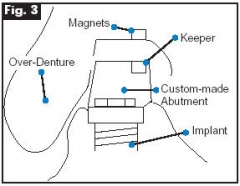
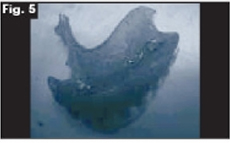
We waited four months before exposing the implants after which a final impression was taken. It was decided that Mag-fit magnets (Aichi Steel) were to be used as the retaining component for the final over-denture. However there were no precision components available to fit the magnets to the implants with such a narrow diameter. We decided to custommake the abutments as shown in fig.3.
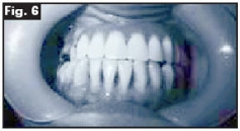
Customised anterior abutment was cantilevered slightly to give space for the placement of the keeper while the two posterior implants were combined to secure a single keeper. The final denture was made from high impact acrylic, where 2 Mag-fit magnets were placed in good alignment with the keepers on the implants.
The use of drill guides made by stereolithography and the custom-made magnet abutments have turned a difficult case to rehabilitate into a more manageable situation with good etention and reasonable esthetics.
Acknowledgements
Mr. Aki Watarai, Aichi Steel, Japan for providing the Mag-fit Magnets Materialise, Belgium for the SimPlant Software
Mr. Ramli and Mr. Arshad of CosmoDent Sdn Bhd for the Laboratory work
Dr. E.H. Chew for his clinical contribution